
TUTORIALS - Easy to Apply and Remove
FIND YOUR SOULMATE FITS IN 3 STEPS
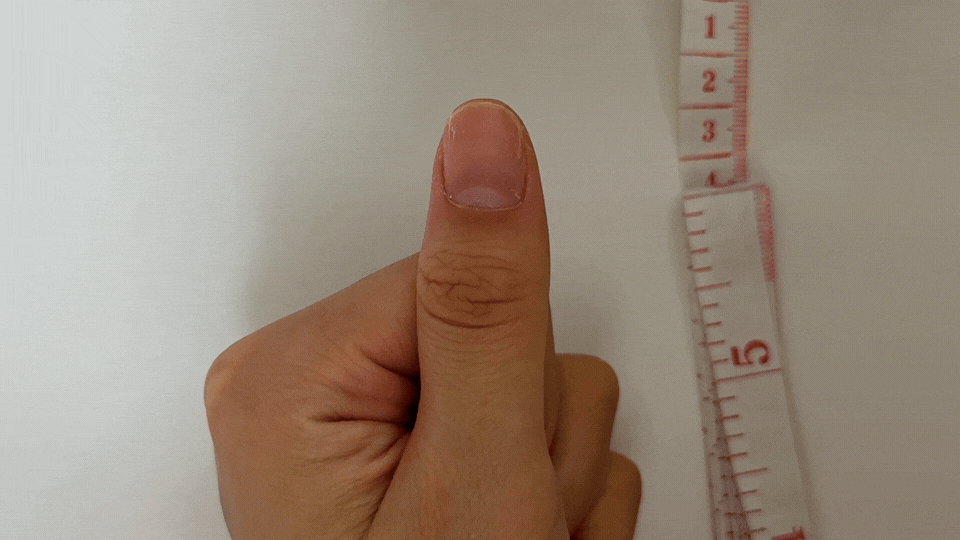
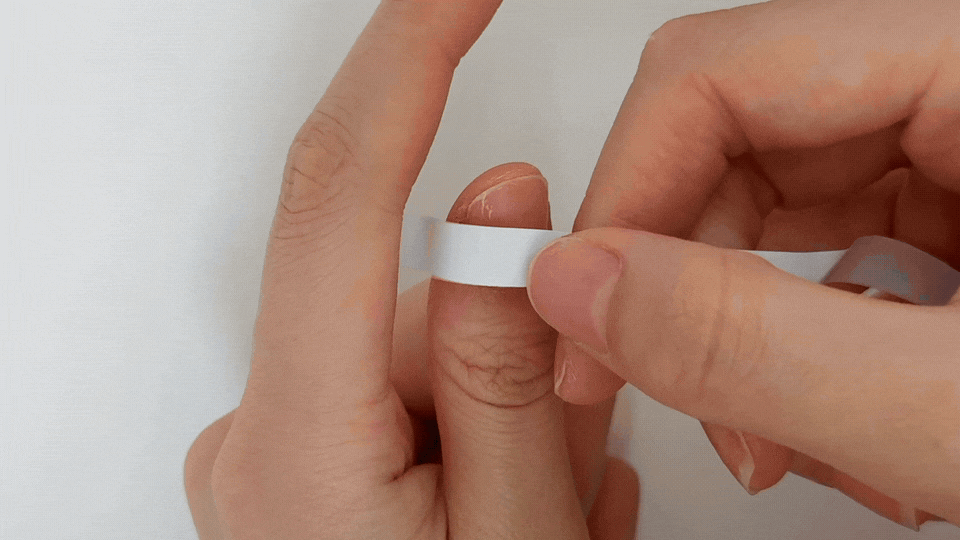
STEP 1|Measure with Precision.
Place measuring tape horizontally across the widest curve of your nail bed. Or press paper to nail, mark widest points, measure straight-line distance between marks.
STEP 2|Matching
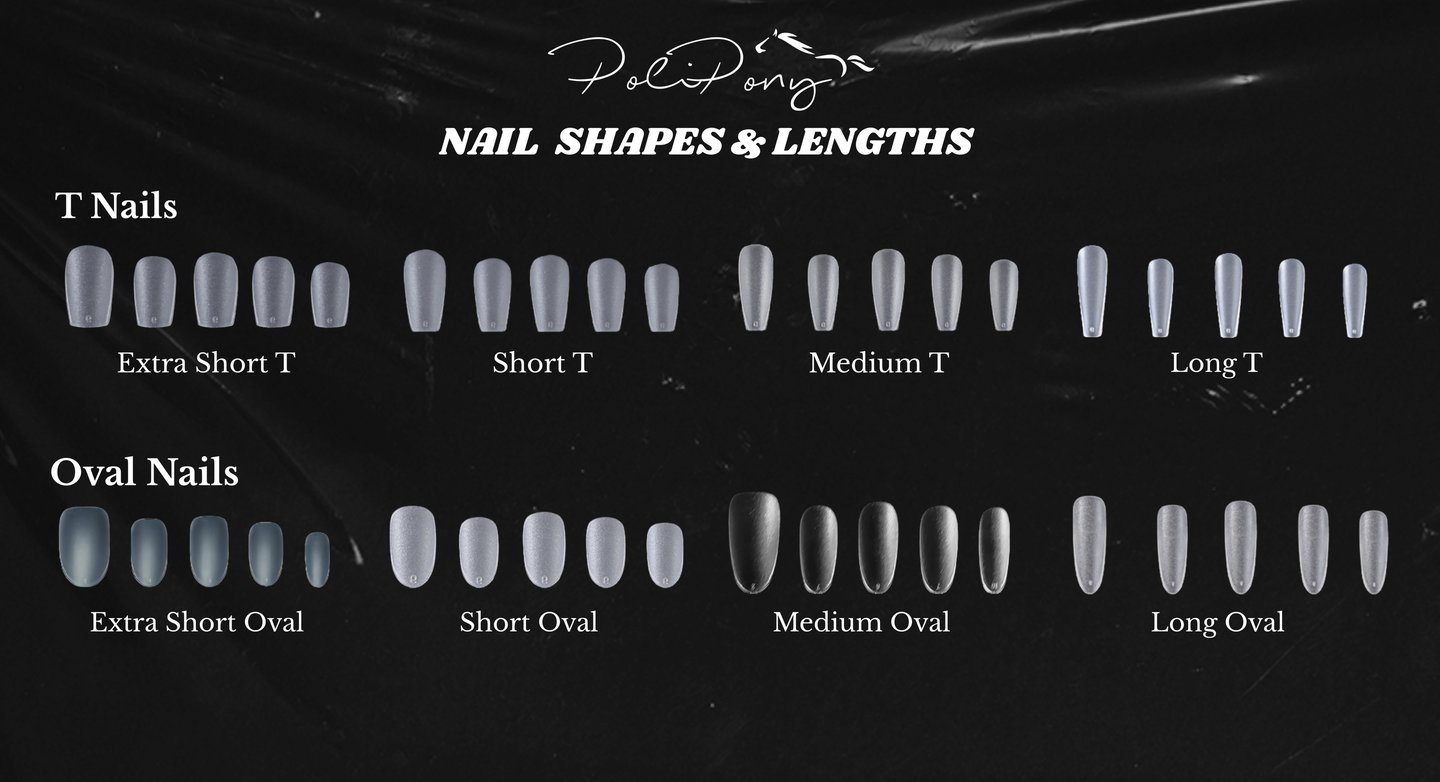
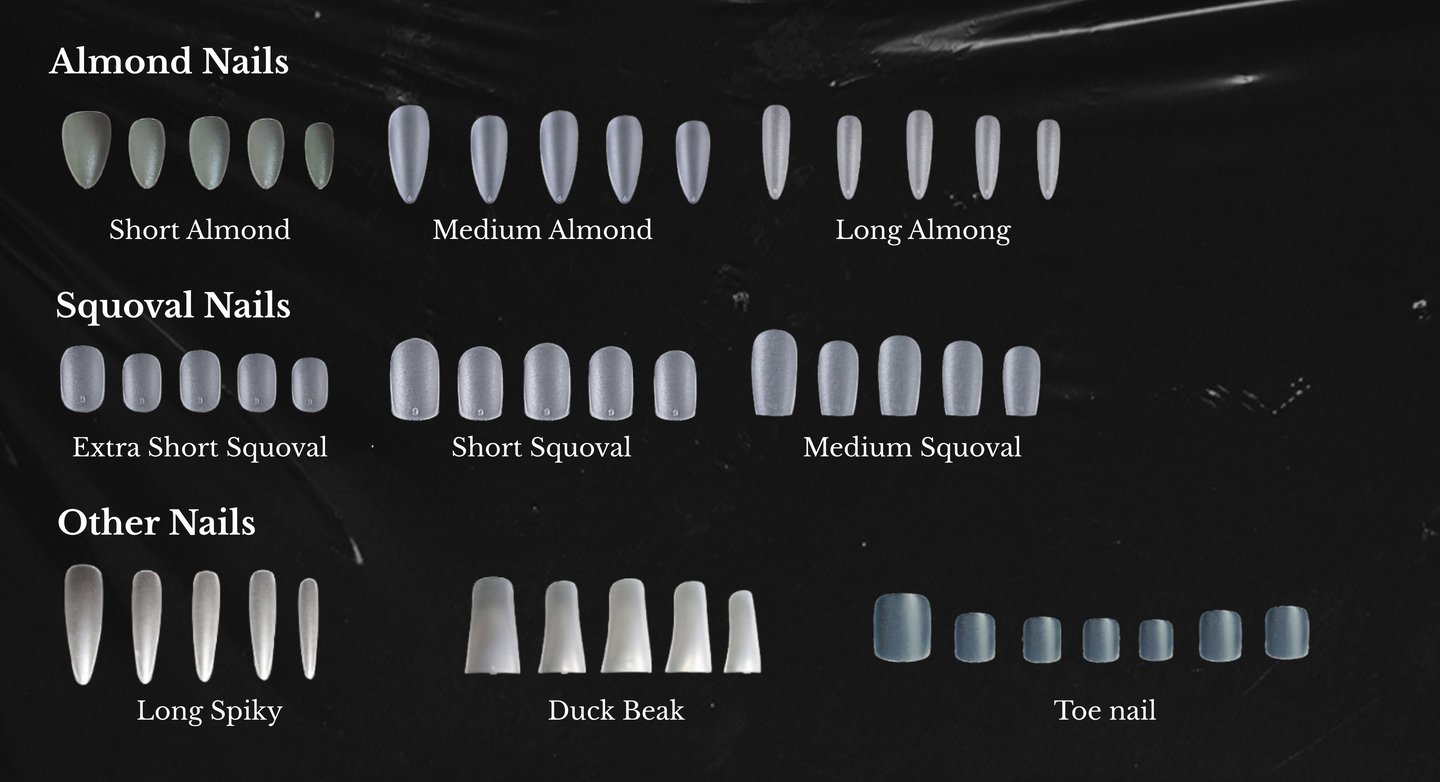
Compare measurements to our chart (mm)↓.
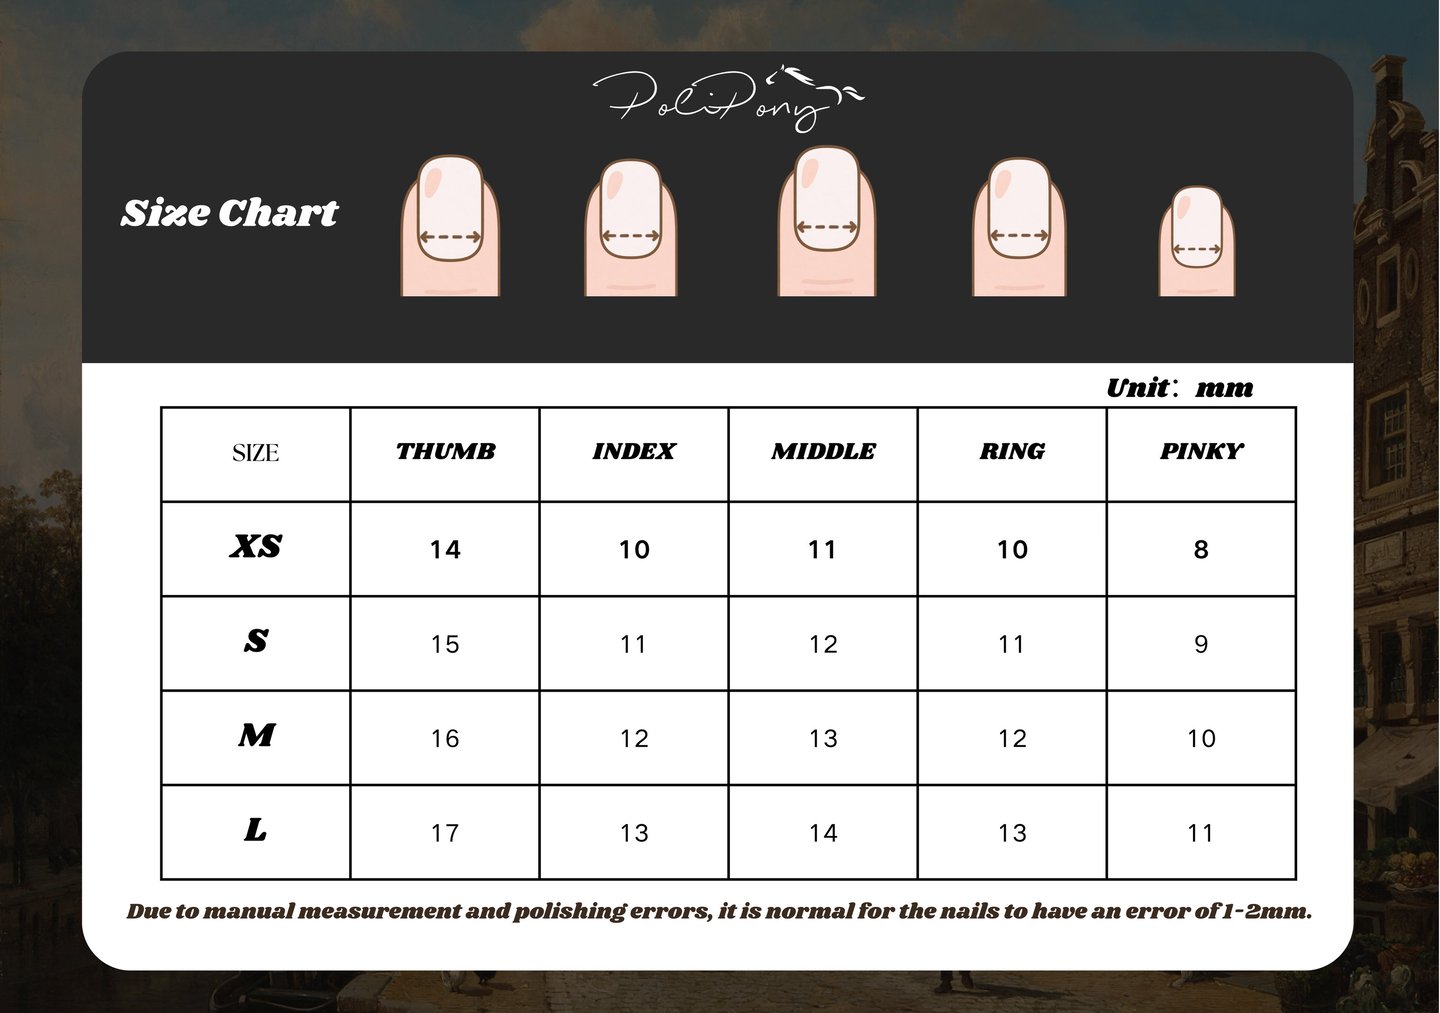
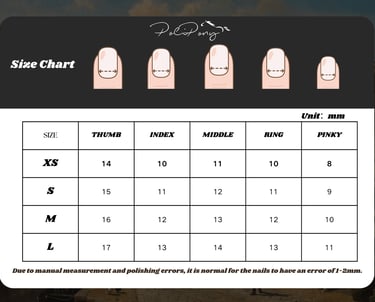
STEP 3|Choose your Ideal Nail Shape


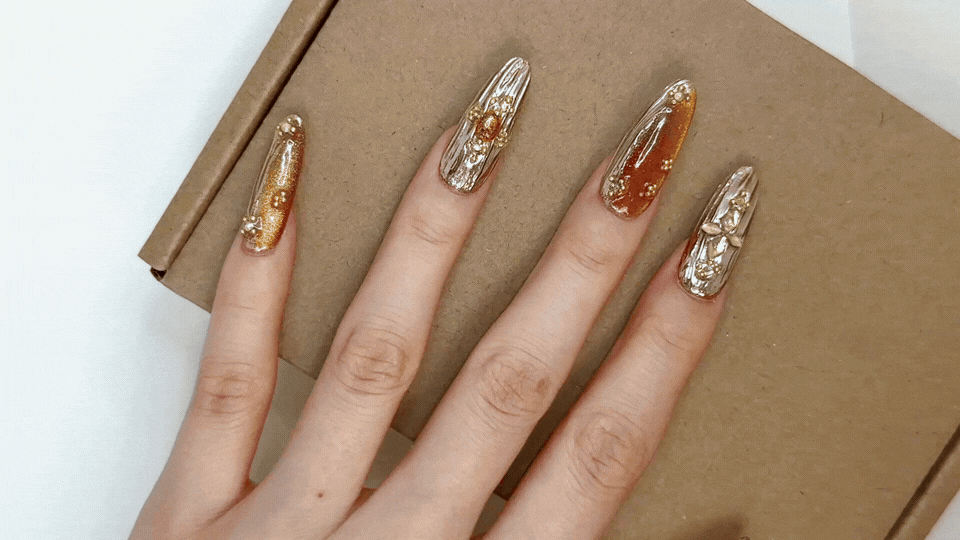
TAKE CONTROL OF YOUR BEAUTY
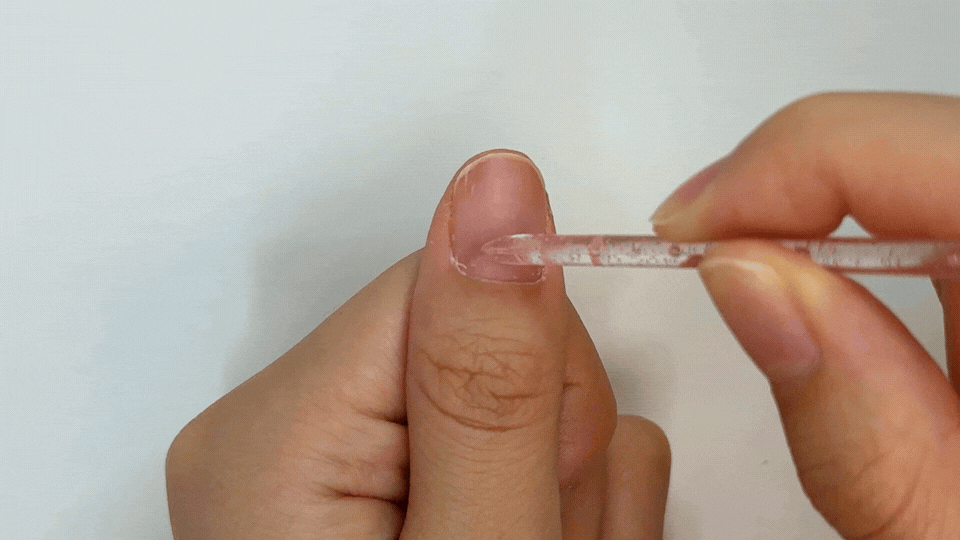
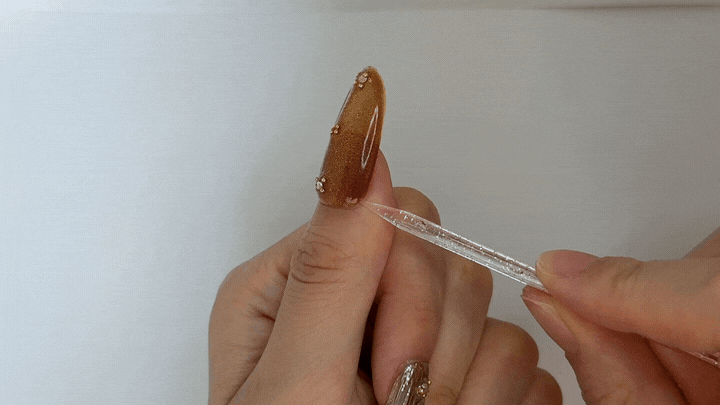
STEP 1|Treating the back edge of the nail:
Use a crystal rod to loosen the dead skin, and trim it with cuticle scissors. Proper removal of dead skin will ensure a smoother, more natural fit. Beginners should be careful not to trim too much to avoid injury.
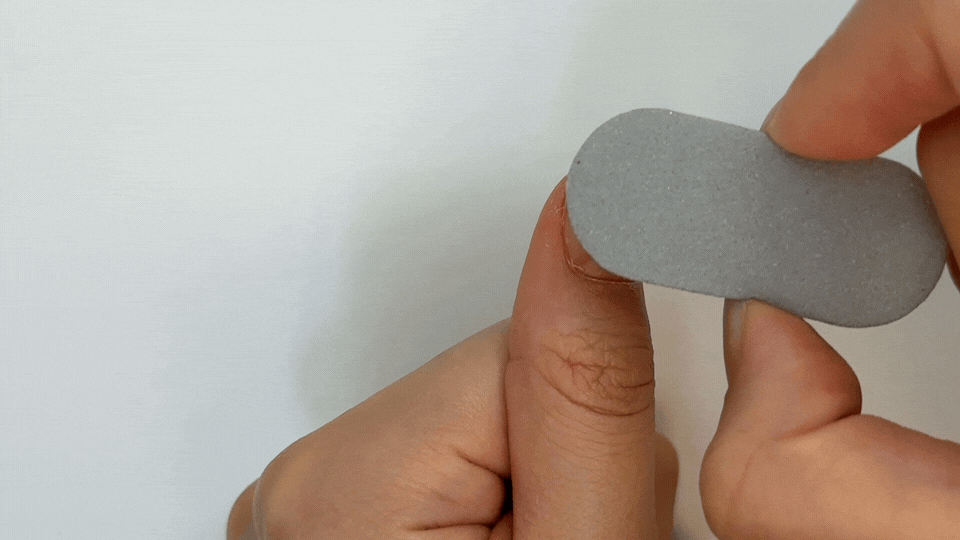
STEP 2|Polishing
Use the nail polish scraper included in the tool kit to lightly polish the nail surface vertically, making sure to polish all around. Polishing increases friction and significantly enhances the adhesion of the jelly glue. Polishing is not recommended for damaged nails.
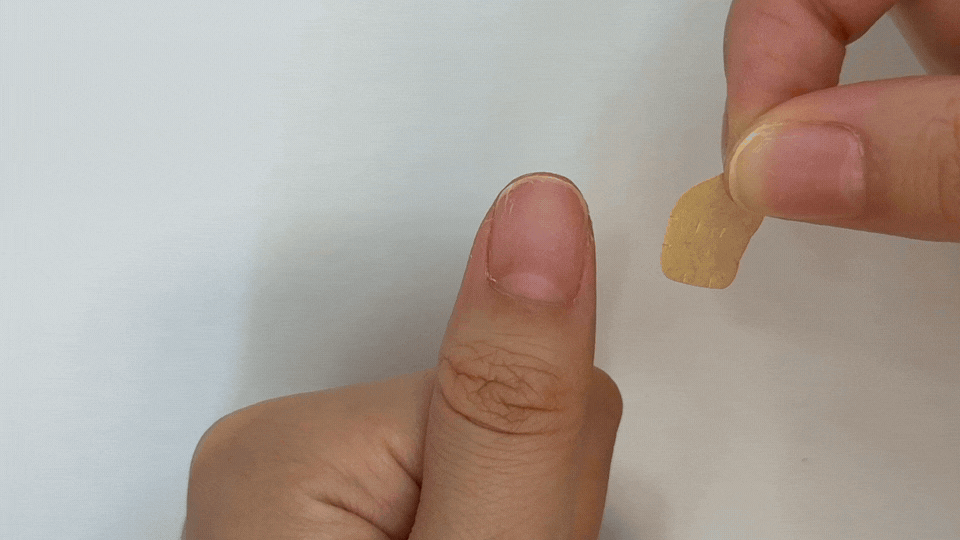
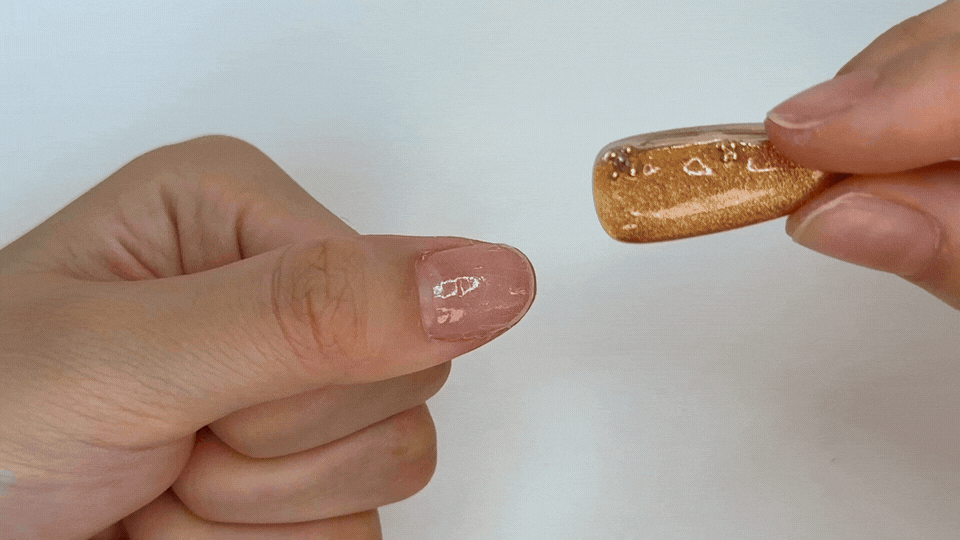
STEP 3|Choosing the size of the jelly glue and applying them
First, compare the size of the jelly glue on the nail surface. Remember to choose larger rather than smaller, and wider rather than longer. Then peel off the jelly glue and apply it approximately 1mm from the back edge of the nail. Remove the plastic wrap.
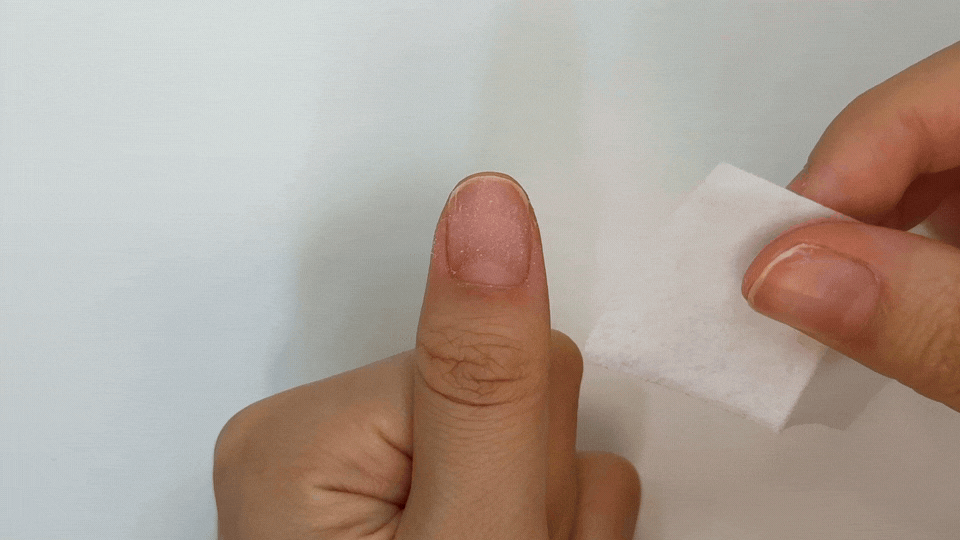
STEP 3|Cleaning
Use an alcohol pad or wet tissue to clean any dust and grease from the nail surface. This will ensure a more secure application.
STEP 4|Applying your beautiful Press-on Nails
Starting 2mm from the rear edge, push the press-on nails back at a 45-degree angle, pressing downward for approximately 30 seconds.
Note: Avoid peeling or exposing your finger tips to water within 3 hours of application. After following the entire application process, you can wash your hair and shower without any problems.
REMOVE AND CHANGE YOUR NAIL STYLE
STEP 1|
Prepare a cup of warm water (adding some oil to the warm water will improve results; cuticle oil, skincare oil, or even cooking oil will work). And place the finger with the jelly glued nail in the water and soak for about 3 minutes.

STEP 3|
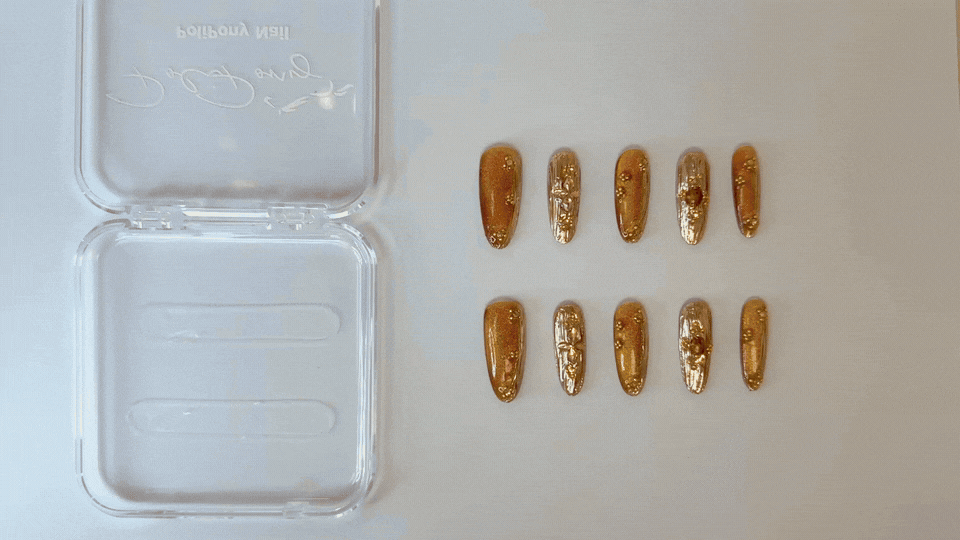
Put ALL your Press-on Nails back to the case!! They don't want to be "Imperfect".
STEP 2|
Slide the angled end of the crystal wand under the nail from the side of the nail, using a back-and-forth motion to separate the glue. Dip the crystal wand in water mid-sentence and repeat the process to make it easier to separate the nail. It's recommended to separate the nails from both sides to minimize damage.
After removal, use the pointed end of the crystal wand to wrap around and remove any remaining glue.

PoliPony
sales@polipony.com
© 2025. All rights reserved.
BRAND
CUSTOMER CARE
Shipping & Return Policy
Customization Service
Reviews